
Get the Look: Hazy Smoky Eye with Ombres Perlees de Chanel
Sunday, April 10, 2011
Here's a simple tutorial I did using the Ombres Perlees de Chanel palette. This post will be pic heavy, so be warned! :)

Apply an eyeshadow primer as a base. Here I am using Etude House's Proof 10 Eye Primer. You'll need this for the Chanel palette, because these eyeshadows need something to hold on to.

Using a black eye pencil (if you have a shimmery grey one, use that instead), rim your eyes with the pencil. Then, take a 239 blending brush and blend out the pencil.


Using the provided applicators and the darkest colour in the palette, gently pat the eyeshadow all over the eyelid, taking it all the way up to the crease, and underneath the eye.

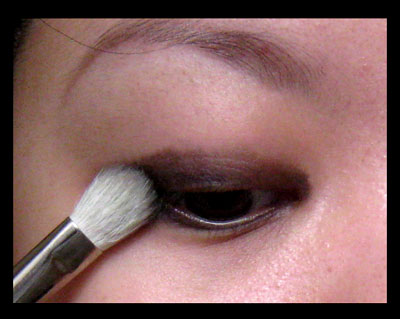
Using the same blending brush, blend out the harsh lines and take the line a little beyond the crease.


Using the dark green colour from the palette, deepen the outer eye by patting the eyeshadow onto the outer lid, all the way up to the crease.
Then, take the purple colour from the palette and pat it onto the inner lid. These colours won't really show up - they're just meant to add more dimension to the 'haze' around the eye.


Highlight beneath the eyebrow with the light yellow colour, then the inner part of the eye, with the pink eyeshadow colour.


Tightline both your upper and lower lashlines, then apply mascara. I used Majolica Majorca's Lash Expander Frame Plus. Apply your foundation. I wanted to keep the look very fresh and clean, so I used Face of Australia Mineral Therapy Liquid Foundation in Beige. It provides a nice, luminous finish, and doesn't look cakey at all.


Apply a rosy pink blush (I am using Face of Australia Blusher in Outback Primrose). Then, highlight with TheBalm Mary Lou-Manizer.

Finally, apply a pink lipstick. I am using my brand new (and current favourite!) Illamasqua lipstick in Obey.


I hope you guys enjoyed this tutorial!


16 comments